Creating an application project
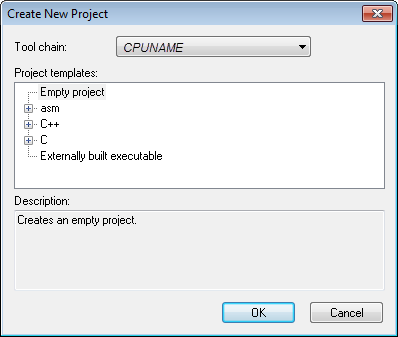
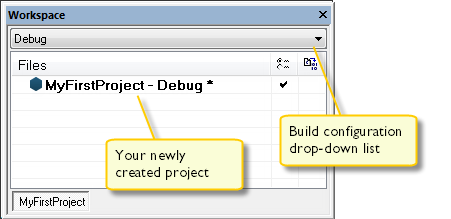
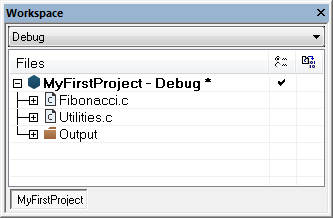
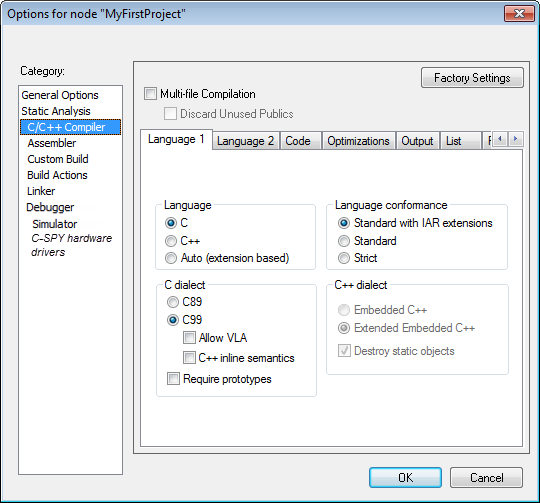
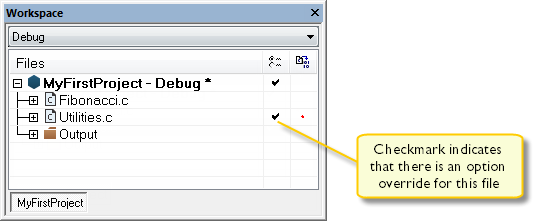
This tutorial introduces you to the IAR Embedded Workbench® IDE. The tutorial demonstrates the initial steps in a typical development cycle where you create a project in the IDE, add source files, and use the compiler and the linker to create a small application.
Note that the screenshots in this tutorial do not always correspond exactly to the counterparts in your product.
Files used in this tutorial
The project in this tutorial uses these files:
*
Contains a simple application that uses only standard features of the C language. It initializes an array with the ten first Fibonacci numbers and prints the result to stdout.
*
Contains required definitions and declarations.
*
Contains utility routines required by Fibonacci.c for the Fibonacci calculations.
*
Contains required definitions and declarations.
We recommend that you create a specific directory (with a subdirectory) where you can store all your tutorial files. In this tutorial we call the directory MyTutorials and the subdirectory GettingStarted. You can find all the files needed for the tutorials in the cpuname\tutorials directory (where cpuname reflects the microcontroller you are using) in your IAR Embedded Workbench installation. Copy the files listed above from the tutorials\GettingStarted directory to your MyTutorials\GettingStarted directory.
Setting up a new project
In this example procedure, you will work through these tasks:
*
*
*
*
For more information about the concepts related to project management, see the IDE Project Management and Building Guide.
Creating a workspace
1
Before you can start creating your project, you must first create a workspace (a workspace is where you collect your projects).
Choose File>New Workspace. An empty Workspace window appears in the IDE.
Creating the new project
1
To create a new project, choose Project>Create New Project.
The Create New Project dialog box appears.
2
From the Tool chain drop-down list, choose the toolchain you are using.
3
There are several ready-made project templates to choose from, both for application and library projects. For this tutorial, select the project template Empty project, which simply creates an empty project that uses default project settings.
Click OK.
4
In the standard Save As dialog box that appears, specify where you want to place your project file, which typically would be in your newly created MyTutorials\GettingStarted directory. Specify MyFirstProject in the File name box, and click Save to create the new project.
A project file—with the filename extension ewp—will be created in the MyTutorials\GettingStarted directory, not immediately, but later on when you save the workspace. This file contains information about your project-specific settings, such as build options.
5
By default, two build configurations are created—Debug and Release—which you view from the drop-down list at the top of the window. In this tutorial, Debug is used.
The asterisk next to the project name indicates that there are changes that have not been saved yet.
6
Before you add any files to your project, you should save the workspace. Choose File>Save Workspace and specify where you want to place your workspace file. For this tutorial, place the file in your newly created MyTutorials\GettingStarted directory.
Type MyFirstWorkspace in the File name box, and click Save to create the new workspace.
A workspace file—with the filename extension eww—has now been created in the MyTutorials\GettingStarted directory. Information about all projects will be stored in this file. Information related to the current session, such as the placement of windows and breakpoints, is located in the files created in the MyTutorials\GettingStarted\settings directory.
Adding files to the project
1
In the Workspace window, select the MyFirstProject project (this is where you will add your files).
2
Choose Project>Add files to open a standard browse dialog box.
Locate the files Fibonacci.c and Utilities.c and select them in the file selection list; click Open to add them to the MyFirstProject project.
This tutorial only contains two source files. However, a real-life project probably contains many source files, maybe hundreds of files. To organize your files logically according to your project needs, you can organize them in hierarchies of groups. Organizing files in hierarchies of groups is useful for many reasons, you can:
*
*
For more information about how to create advanced project structures, see the IDE Project Management and Building Guide.
Setting project options
For application projects, options can be set on all levels—projects, groups, and on individual files.
1
In the Workspace window, select MyFirstProject – Debug, right-click and choose Options from the context menu. The Target options page in the General Options category is displayed.
For this tutorial you can use the default settings.
2
In the Category list, select C/C++ Compiler.
This displays the compiler options:
For this tutorial you can use the default settings. In addition to the default settings, click the List tab, and select the options Output list file and Assembler mnemonics. Click OK.
Compiling and linking the application
In this example procedure, you will work through these steps:
*
*
*
*
Compiling the source files
1
To compile the file Fibonacci.c, select it in the Workspace window, right-click and choose Compile from the context menu.
The progress is displayed in the Build messages window.
2
Compile the file Utilities.c in the same manner.
The IDE has now created new directories in your project directory. Because you are using the build configuration Debug, a Debug directory has been created that contains these subdirectories:
 
The destination directory for the executable file. It has the extension out and is used as input to the IAR C-SPY® Debugger. Note that this directory is empty until you have linked the object files.
3
Click on the plus signs in the Workspace window to expand the view. As you can see, the IDE has also created an Output group that contains any generated output files. All included header files are displayed as well, showing the dependencies between the files:
Fine-tuning the optimization levels
Now you will investigate how different optimization levels affect the generated code size. You will do this by changing the optimization level for just one of the files, Utilities.c, which means that you will override the project settings for that file.
1
In the Workspace window, double-click Utilities.lst to open the list file. Examine the list file, which contains this information:
*
*
*
Notice the amount of generated code at the end of the file and keep the file open.
2
Choose Tools>Options to open the IDE Options dialog box and click Editor in the left-side pane. Make sure the option Scan for changed files is selected.
This option enables the automatic update of any file open in an editor window, such as a list file:
Click OK.
3
In the Workspace window, select Utilities.c, right-click and choose Options from the context menu. The compiler options are displayed in the Options dialog box. Select the C/C++ Compiler category.
4
Select the Override inherited settings option, click the Optimizations tab and choose High level of optimization.
Click OK.
This new setting will only affect Utilities.c. Notice how overriding the project options on file level is indicated with a black checkmark () in the Workspace window.
Note that you can override options on individual files as well as on groups of files.
5
Compile the file Utilities.c a second time. Now you will notice two things. First, note the automatic updating of the open list file due to the selected option Scan for changed files. Second, look at the end of the list file and notice the effect on the code size due to the increased optimization and how it differs from the first compilation.
By investigating the generated code size in this manner you can use this method to fine-tune the optimization levels for the various files and groups of files.
6
Select Utilities.c in the Workspace window, right-click, and choose Options from the context menu. Deselect Override inherited settings and click OK. Recompile the file Utilities.c.
Linking the application
In this procedure, you will set linker options and link the application.
1
In the Workspace window, select MyFirstProject – Debug, right-click and choose Options from the context menu.
2
In the Options dialog box, select the Linker category and inspect the settings. For this tutorial, pay attention to:
*
The linker produces an output file in the ELF format, including DWARF for debug information.
*
Linker listings are created by default, but click the List tab, and make sure that the options Generate linker map file and Generate log file (and some log output suboptions) are selected.
*
Program code and data are placed in memory according to the configuration specified in the linker configuration file (filename extension icf). It is important to be familiar with its syntax for how sections are placed in memory.
In this tutorial you will use the default linker configuration file. (To override the default configuration file, click the Config tab.)
Read more about the linker configuration file in the IAR C/C++ Development Guide.
Click OK.
3
Choose Project>Make. The progress is as usual displayed in the Build messages window. The result of the linking is the code file MyFirstProject.out with debug information located in the Debug\Exe directory and a map file MyFirstProject.map located in the Debug\List directory.
Viewing the linker listings
1
Open the MyFirstProject.map file which you can find in the project’s Output group in the Workspace window. The map file typically contains:
*
*
*
The linker can also generate a log file, which logs decisions made by the linker regarding:
*
*
*
*
*
*
*
Typically, this information can be useful if you want to examine:
*
*
*
*
The MyFirstProject.out application is now ready to be executed in C-SPY.